Set Up Dashboard Alerts
Info/Context
Type: End-user documentation
Audience: CompanyName Dashboard users
Purpose: A conceptual guide that describes how to set up email alerts through the CompanyName Dashboard. There are two different ways to set up alerts, although both methods yield identical results.
Note: Some words and phrases are enclosed in [brackets] to represent hyperlinks to other docs not included in this sample library.
The [CompanyName Dashboard] offers several tools to help you analyze traffic data, including the ability to configure email alerts. You can configure these alerts to notify you if CompanyName detects traffic fluctuations based on customizable criteria.
You can create alerts from either the [Summary] section or [Explore] section of the CompanyName Dashboard.
Create an alert from the Summary section

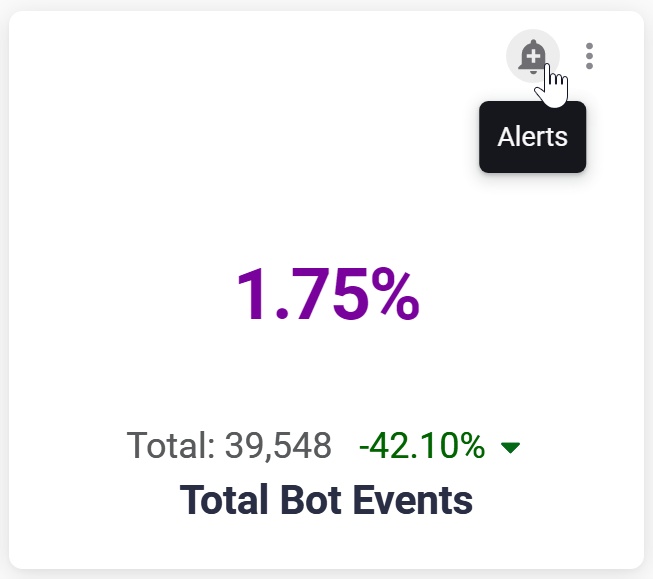
The [Summary] section of the Dashboard includes multiple visualizations of your traffic data. If a visualization includes some form of quantitative data (like a number, percentage, or chart), you can create or edit alerts from that data by hovering over the visualization’s card and selecting the Alert icon.
Any [filters] you apply to the Summary section will not affect your alerts. Filters only change which data is displayed in each card’s visualization, not the conditions that trigger alerts. If you’d like to change the conditions that trigger an alert, you can edit an existing alert.
Create a new alert

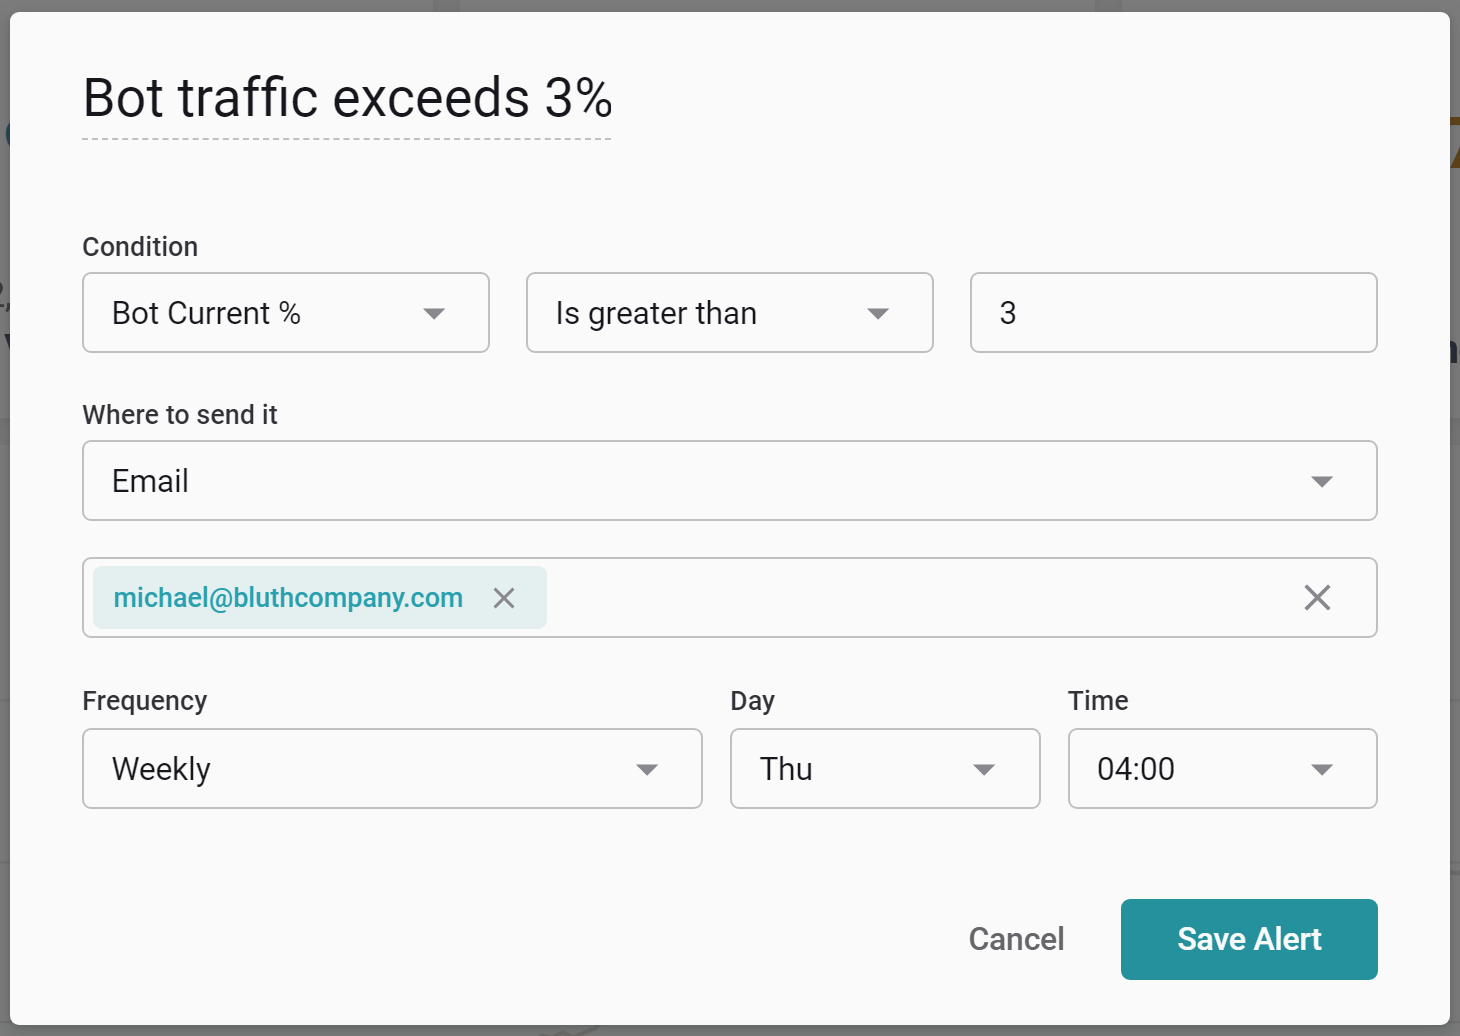
The alert creation window lets you customize the name, condition, recipient(s), and frequency of your alert.
- Name: The name of your alert. CompanyName assigns all alerts a default name, but you can override this with a name of your choosing.
- Condition: The data condition that must be met to trigger the alert. Each condition consists of a data metric, a constraint, and a numeric value. For example, if you’d like to receive an alert when bots exceed three percent of your total traffic, select the “Bot Current %” metric and “is greater than” constraint, then enter
3in the associated text box. - Recipient(s): The person (or people) who will receive an email notification if your alert’s condition is met. An alert must have at least one recipient.
- Frequency: How often CompanyName checks your data for changes. For example, if you create an alert with a daily frequency, CompanyName will analyze your data once a day and send you an email notification if your alert’s conditions were met during that check. You can configure an alert’s frequency to run on a monthly, weekly, or daily basis, or to run multiple times a day in intervals as long as every 12 hours or as short as every 15 minutes.
When you’ve finished configuring your alert, select Save Alert to finalize your changes.
Edit or remove an existing alert
If a data visualization already has one or more alerts associated with it, selecting the Alerts icon will open a menu with a list of those alerts instead of the alert creation menu. You can select the three dots menu next to an alert’s name to edit, duplicate, or delete that alert, or select the New button to create a new alert.
Create an alert from the Explore section
The [Explore] section of the Dashboard provides detailed insights into your traffic data. You can use customizable Explore views to to create and edit alerts.
Explore views only support one alert per view.
Create a new alert
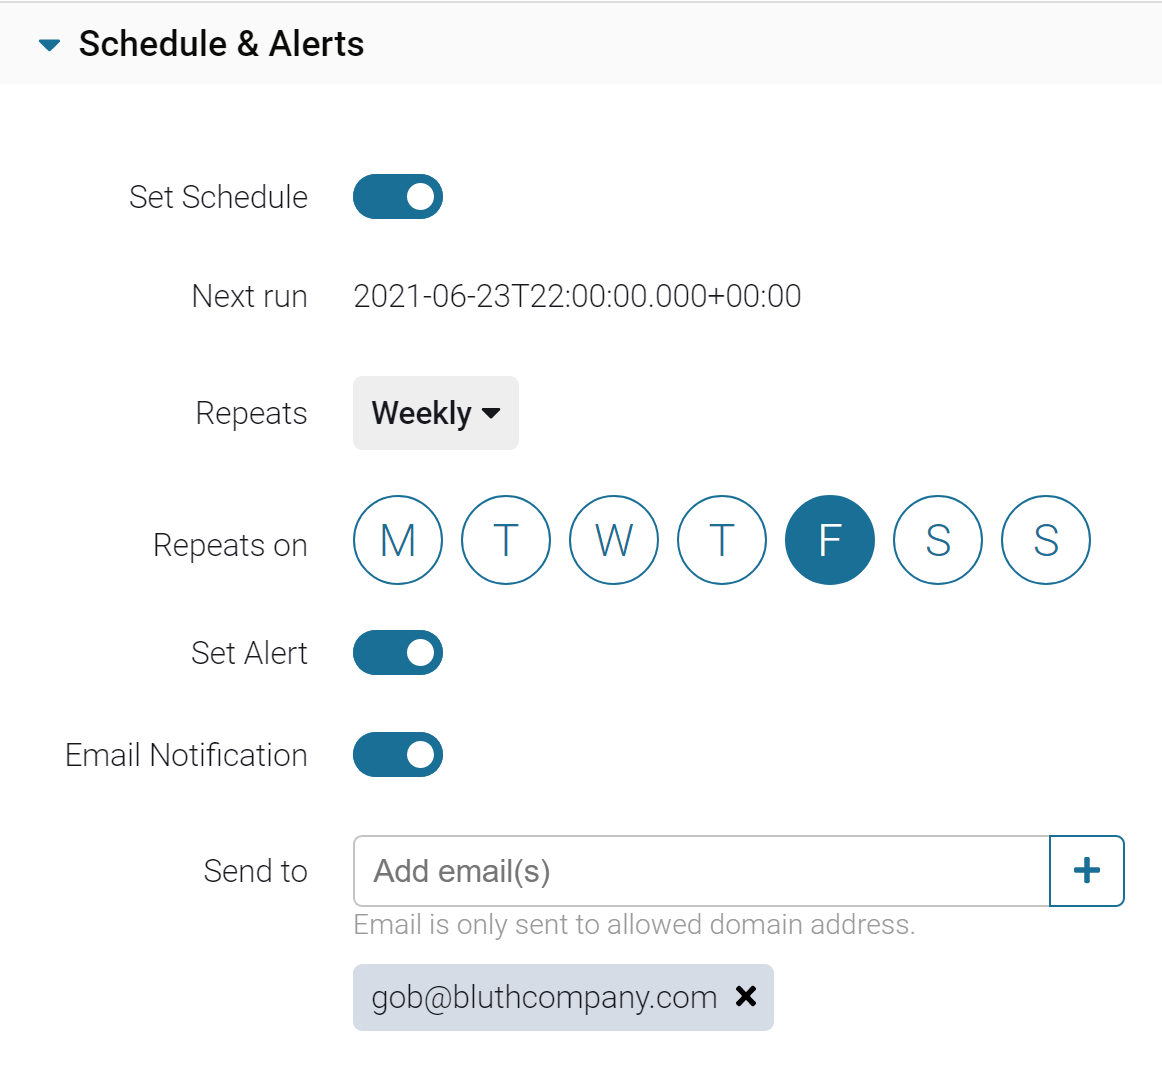
To build the foundation for your alert, create or adjust a view associated with the relevant data, then open the Schedules & Alerts menu and select the Set Schedule toggle.

When the Set Schedule toggle is enabled, CompanyName will generate report files that appear in the [Reports] section of the Dashboard. These reports will be generated according to your selected settings. For more information about these settings, see [Schedules & Alerts].
However, if you’d like to create an alert that only generates a report when certain conditions are triggered, you must also enable the Set Alert toggle.
When both the Set Schedule toggle and Set Alert toggle are enabled, CompanyName will only generate report files if those reports contain data based on your selected fields, metrics, and filters. (In other words, if a report contains no data, the empty report file will not be generated.)
Filters
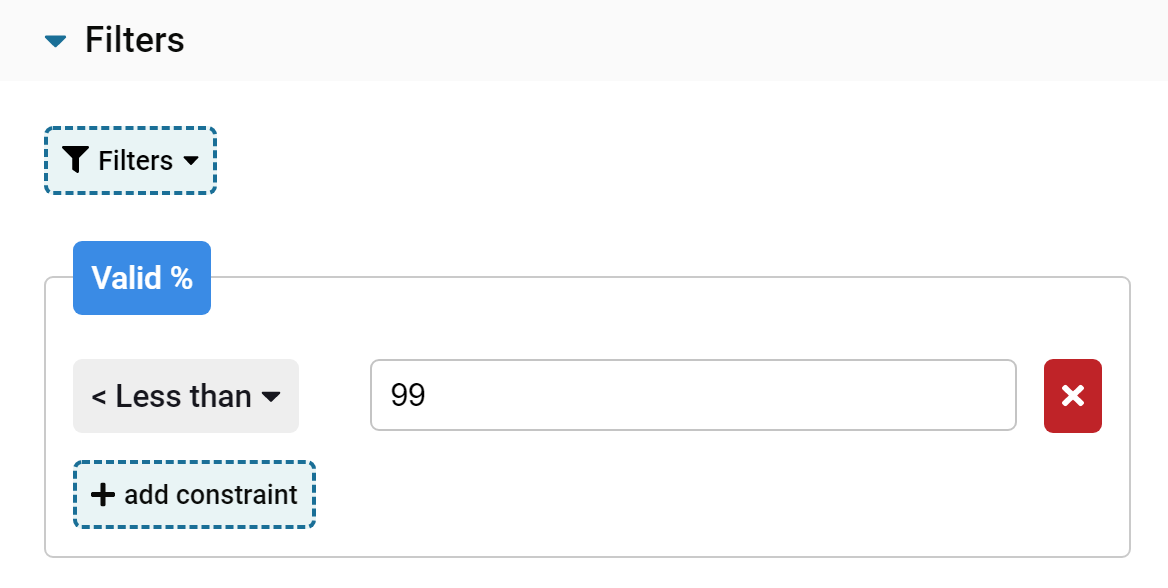
You can create simple thresholds for your alerts by filtering data based on the metric of your choosing. Since alert-based reports will only generate a report file when that report contains data, filters will prevent report files from being generated if no data meets the filtered condition(s).

For example, if you’d like to receive an alert when valid traffic falls below 99%, create a filter using the “Bot %” metric, then select the “Less than” constraint and enter 99 in the associated text box.
This filter displays a list of traffic sources who receive less than 99% valid traffic and hides all other data. As such, if any traffic sources meet this condition, CompanyName will detect the relevant data and generate a report; if no traffic sources meet this condition, CompanyName will not generate a report file.
When you’ve finished configuring your filter, select Save to finalize your changes.
Edit or remove an existing alert
If an Explore view already has an associated alert, you can load that view to edit or disable its alert.